Getting Started
No cloning, no building. Install the tunnel and MCP server from npm, grab the plugin from GitHub, and connect.
Prefer full source control? See the clone-and-build guide.
Prerequisites
Section titled “Prerequisites”- Node.js (v18+)
- Figma desktop or web app
- An AI coding tool with MCP support (Claude Code, Cursor, Windsurf, etc.)
Recommended models
Section titled “Recommended models”Use the latest models for best results with Vibma:
| Model | Provider |
|---|---|
| Claude Opus 4.6 | Anthropic (Claude Code, Cursor, etc.) |
| GPT-5.3-Codex | OpenAI (ChatGPT Codex) |
| Gemini 3.1 Pro | Google (Gemini CLI, Cursor, etc.) |
Older or smaller models may struggle with complex multi-tool workflows.
1. Download the Figma plugin
Section titled “1. Download the Figma plugin”Grab the latest vibma-plugin from GitHub Releases — it contains manifest.json, code.js, and ui.html.
Unzip it.
2. Start the WebSocket tunnel
Section titled “2. Start the WebSocket tunnel”npx @ufira/vibma-tunnelYou should see: WebSocket server running on port 3055
About ports
Section titled “About ports”Vibma defaults to port 3055. The Figma plugin whitelists ports 3055–3058 so you have alternatives if 3055 is already in use. To use a different port:
VIBMA_PORT=3056 npx @ufira/vibma-tunnelUpdate the port field in the Figma plugin UI before clicking Connect to match.
3. Install the Figma plugin
Section titled “3. Install the Figma plugin”- In Figma, go to Plugins > Development > Import plugin from manifest…
- Select the
manifest.jsonfrom the unzipped plugin folder - Run the plugin — it will show a connection panel
4. Configure MCP in your AI tool
Section titled “4. Configure MCP in your AI tool”Add to your MCP config (e.g. .cursor/mcp.json, .claude.json, or .mcp.json):
{ "mcpServers": { "Vibma": { "command": "npx", "args": ["-y", "@ufira/vibma@latest", "--edit"] } }}Access tiers
Section titled “Access tiers”Vibma uses access tiers to control which tools are available. Pass a flag to set the tier:
| Flag | Tools available | Use case |
|---|---|---|
| (none) | Inspect, search, export | Safe browsing, audits |
--create | Read + create tools such as frames, text, and shapes | Generating new designs |
--edit | Full tool access, including edit and delete operations | Full design workflow |
Most users want --edit for full access. Omit the flag for read-only mode.
Non-default port
Section titled “Non-default port”If using a non-default port, add --port=:
{ "mcpServers": { "Vibma": { "command": "npx", "args": ["-y", "@ufira/vibma@latest", "--edit", "--port=3056"] } }}Remote or non-localhost relay
Section titled “Remote or non-localhost relay”By default the MCP server connects to localhost. If the relay is running on a different host (e.g. Docker, a VM, or a remote machine), set VIBMA_SERVER:
{ "mcpServers": { "Vibma": { "command": "npx", "args": ["-y", "@ufira/vibma@latest", "--edit"], "env": { "VIBMA_SERVER": "host.docker.internal" } } }}The --server=<host> CLI arg also works and takes priority over the env var.
Local addresses (localhost, 127.0.0.1, host.docker.internal, 0.0.0.0, *.local) use ws:// and http://. All other addresses use wss:// and https://.
Optional: Library & Image API Keys
Section titled “Optional: Library & Image API Keys”Vibma’s core tools work without any API keys. To unlock team library discovery and stock photo search, add environment variables to your MCP config:
{ "mcpServers": { "Vibma": { "command": "npx", "args": ["-y", "@ufira/vibma@latest", "--edit"], "env": { "FIGMA_API_TOKEN": "<your-figma-pat>", "FIGMA_TEAM_ID": "<your-team-id>", "PEXELS_API_KEY": "<your-pexels-key>" } } }}Getting a Figma Personal Access Token
Section titled “Getting a Figma Personal Access Token”-
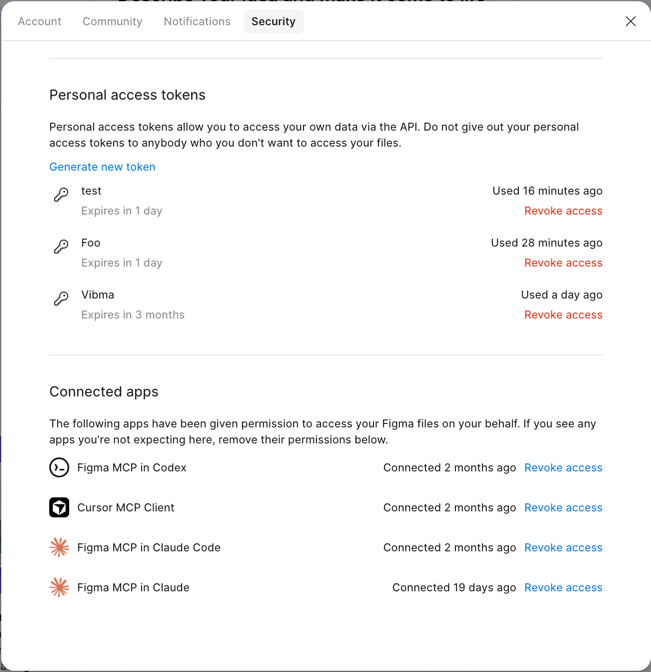
Go to Figma Settings > Security and scroll to Personal access tokens
-
Click Generate new token and select these two scopes:
- File content — Read (
file_content:read) - Team library content — Read (
team_library_content:read)
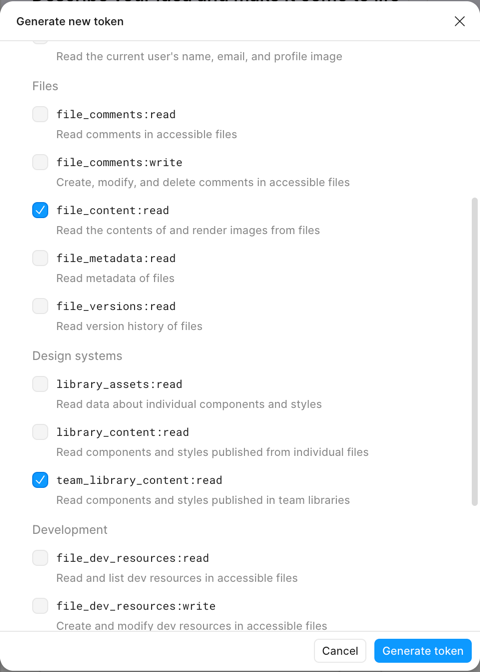
- File content — Read (
-
Copy the generated token — it starts with
figd_
Getting your Team ID
Section titled “Getting your Team ID”Your Team ID is the number in your Figma home page URL:
https://www.figma.com/files/team/1234567890/... ^^^^^^^^^^ This is your TEAM_ID
Getting a Pexels API Key
Section titled “Getting a Pexels API Key”- Go to pexels.com/api/key and sign up or log in
- Request an API key — it’s free for personal and commercial use
- Copy the key from your dashboard
Pexels photos are free to use, even commercially. Please read the Pexels Terms of Service and credit photographers if you use images in production. Vibma automatically attaches photographer attribution to placed images as a node description.
5. Connect
Section titled “5. Connect”- In the Figma plugin, set the channel name to
vibma(or any name you like) - Click Connect
- In your AI tool, call
connection(method: "create")with the same channel name (defaults tovibma) - Call
connection(method: "get")— you should get backpongwith your document name
Updating
Section titled “Updating”npx caches packages, so you may not get the latest version automatically. To update:
MCP server & tunnel — use the @latest tag:
npx @ufira/vibma-tunnel@latest{ "mcpServers": { "Vibma": { "command": "npx", "args": ["-y", "@ufira/vibma@latest", "--edit"] } }}Or clear the npx cache to force a fresh download next time:
npx clear-npx-cacheFigma plugin — download the latest vibma-plugin.zip from GitHub Releases, unzip, and re-import the manifest.json in Figma.
Troubleshooting
Section titled “Troubleshooting”Plugin won’t connect to WebSocket: Make sure the tunnel is running. The plugin connects to ws://localhost:3055 by default.
MCP shows disconnected: Restart your AI tool after changing MCP config. Stdio-based MCP servers can’t hot-reload.
Port already in use: Kill the existing process (lsof -ti:3055 | xargs kill) or use the next available port (3056–3058).